


日期:2019/12/12
前言
以前在維基百科上看到用 MATLAB 繪製的兩個點波源水波干涉動畫,後來我參考網頁上的程式碼,試著用 Scilab 畫出一樣的動畫,甚至把它改成立體圖。但是我現在比較常用 Matplotlib 套件繪圖,也在網路上看過一些用 Matplotlib 繪製的 gif 檔,於是我花了一點時間研究一下繪製動畫的方法。

維基百科兩個點波源水波干涉動畫,圖片來源為 https://en.wikipedia.org/wiki/File:Two_sources_interference.gif

使用 Scilab 自行繪製的水波干涉動畫(2D版)
使用 Scilab 自行繪製的水波干涉動畫(3D版)
2D 版動畫
以下的程式中,數學式子的部分主要是參考維基百科上的圖片 [1],動畫的部分主要是參考 Python Matplotlib Tips 網站 [2],為了使 color bar 的高度與圖片相同,則參考了 StackOverflow 上的文章 [3]。在我一開始寫的版本當中,圖形的顏色一直沒有對應到Z軸的量值,後來改用 plt.cm.ScalarMappable 對應到陣列 np.arange(-cut, cut, 0.1) 才解決這個問題。[4]
import numpy as np
import matplotlib.pyplot as plt
from mpl_toolkits.axes_grid1 import make_axes_locatable
import matplotlib.animation as animation

"""
 1.參數設定
"""
L, sep, N, k, cut = 6, 2, 500, 5, 0.8 # 0.5倍寬度, 波源與原點距離, 每邊分割數量, 角波數, z軸範圍
fps, frn = 24, 50           # 每秒影格數量, 影格總數
x = np.linspace(-L, L, N)   # x軸
y = np.linspace(-L, L, N)   # y軸
X, Y = np.meshgrid(x, y)    # 組成2維陣列
j = np.complex(0, 1)        # 根號 -1

"""
 2.設定計算振幅的函數, 計算每個位置的振幅並存入陣列
"""
# 自訂函式, 計算每個位置對應的振幅
def func(x, y, t):
    r1 = np.sqrt((x-sep)**2 + y**2)    # 點波源1
    r2 = np.sqrt((x+sep)**2 + y**2)    # 點波源2
    z = np.exp(j*k*r1)/r1 + np.exp(j*k*r2)/r2    # 兩個點波源的 Green's function 總合
    return np.real(z*np.exp(-j*t))    # 回傳實部

Z = np.zeros((N, N, frn))   # 儲存振幅用的2維陣列
T = np.linspace(0, 2*np.pi, frn)   # 儲存時間用的1維陣列

# 計算每個時刻每個位置對應的振幅, 有加cut效果較佳
for i in range(frn):
    Z[:, :, i] = func(X, Y, T[i]).clip(-cut, cut)

"""
 3.繪圖
"""
fig = plt.figure(figsize=(7, 6), dpi=100)   # 開啟繪圖視窗
ax = fig.gca()
ax.set_aspect(1.0)   # 使圖片長寬變成1:1

# 以某個預設的colormap為基底, 修改成對應到 -cut ~ +cut 的colormap
mappable = plt.cm.ScalarMappable(cmap=plt.cm.jet)
mappable.set_array(np.arange(-cut, cut, 0.1))

# 在圖片右側加上color bar, 高度與圖片相同
divider = make_axes_locatable(ax)
cax = divider.append_axes("right", size="5%", pad=0.05)
plt.colorbar(mappable, cax=cax)

# 自訂函式, 先移除前一張圖, 再畫出下一張圖
def update(frame_number):
    plot[0] = ax.contourf(X, Y, Z[:, :, frame_number], cmap=mappable.cmap, norm=mappable.norm)

# t = 0 的圖片
plot = [ax.contourf(X, Y, Z[:, :, 0], cmap=mappable.cmap, norm=mappable.norm)]

# 產生動畫, 目標為繪圖物件fig, 使用自訂函式update更新圖片, 圖片總數為frn, 時間間隔為interal, 單位為ms
ani = animation.FuncAnimation(fig, update, frn, interval=1000/fps)

plt.show()   # 顯示圖片

ani.save('TwoSourcesInterference2D.gif', writer='imagemagick', fps=fps)   # 儲存圖片

使用 Matplotlib 自行繪製的水波干涉動畫(2D版)
3D 版動畫
以下的程式與 2D 版本相當接近,但是要將繪圖物件改為 3D,並改用 plot_surface 繪圖。
import numpy as np
import matplotlib.pyplot as plt
from matplotlib.ticker import LinearLocator, FormatStrFormatter
from mpl_toolkits.mplot3d import Axes3D
import matplotlib.animation as animation

"""
 1.參數設定
"""
L, sep, N, k, cut = 6, 2, 500, 5, 5 # 0.5倍寬度, 波源與原點距離, 每邊分割數量, 角波數, z軸範圍
fps, frn = 24, 50           # 每秒影格數量, 影格總數
x = np.linspace(-L, L, N)   # x軸
y = np.linspace(-L, L, N)   # y軸
X, Y = np.meshgrid(x, y)    # 組成2維陣列
j = np.complex(0, 1)        # 根號 -1

"""
 2.設定計算振幅的函數, 計算每個位置的振幅並存入陣列
"""
# 自訂函式, 計算每個位置對應的振幅
def func(x, y, t):
    r1 = np.sqrt((x-sep)**2 + y**2)    # 點波源1
    r2 = np.sqrt((x+sep)**2 + y**2)    # 點波源2
    z = np.exp(j*k*r1)/r1 + np.exp(j*k*r2)/r2    # 兩個點波源的 Green's function 總合
    return np.real(z*np.exp(-j*t))    # 回傳實部

Z = np.zeros((N, N, frn))   # 儲存振幅用的2維陣列
T = np.linspace(0, 2*np.pi, frn)   # 儲存時間用的1維陣列

# 計算每個時刻每個位置對應的振幅, 有加cut效果較佳
for i in range(frn):
    Z[:, :, i] = func(X, Y, T[i]).clip(-cut, cut)

"""
 3.繪圖
"""
fig = plt.figure(figsize=(8, 6), dpi=100)   # 開啟繪圖視窗
ax = fig.gca(projection='3d')   # 設定為 3D 繪圖
ax.set_zlim(-cut, cut)   # 設定z軸範圍
ax.zaxis.set_major_locator(LinearLocator(10))   # 將z軸分為10格
ax.zaxis.set_major_formatter(FormatStrFormatter('%.1f'))   # 設定z軸數值格式

# 以某個預設的colormap為基底, 修改成對應到 -cut ~ +cut 的colormap
mappable = plt.cm.ScalarMappable(cmap=plt.cm.jet)
mappable.set_array(np.arange(-cut, cut, 0.1))

# 自訂函式, 先移除前一張圖, 再畫出下一張圖
def update(frame_number):
    plot[0].remove()
    plot[0] = ax.plot_surface(X, Y, Z[:, :, frame_number], cmap=mappable.cmap,
                              norm=mappable.norm, linewidth=0.5, antialiased=False, alpha=0.7)

# t = 0 的圖片
plot = [ax.plot_surface(X, Y, Z[:, :, 0], cmap=mappable.cmap, norm=mappable.norm,
                        linewidth=0.5, antialiased=False, alpha=0.7)]

# 顯示數值及色階對應方式
fig.colorbar(mappable, shrink=0.5, aspect=5)

# 產生動畫, 目標為繪圖物件fig, 使用自訂函式update更新圖片, 圖片總數為frn, 繪圖資料為Z, 更新圖片plot的Z軸數值, 時間間隔為interal, 單位為ms
ani = animation.FuncAnimation(fig, update, frn, interval=1000/fps)

plt.show()   # 顯示圖片

ani.save('TwoSourcesInterference3D.gif', writer='imagemagick', fps=fps)   # 儲存圖片

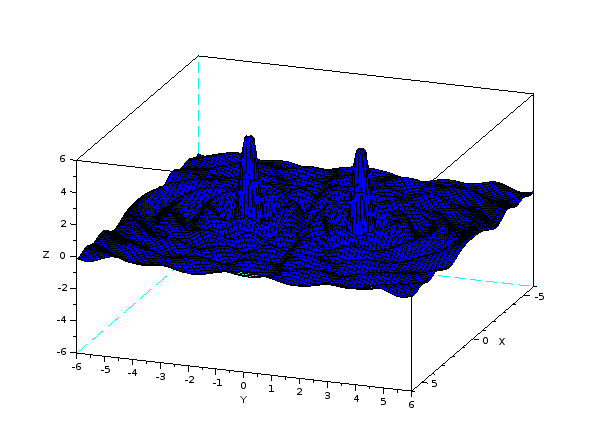
使用 Matplotlib 自行繪製的水波干涉動畫(3D版)
安裝 imagemagick 套件
為了將產生的圖片存成 gif 檔,需要事先安裝 imagemagick 套件,存檔之後可以再用這個套件將檔案縮小。
Windows 版安裝方法
Windows 版的安裝方法很簡單,先到下載頁面找到對應的版本,下載安裝檔之後執行檔案,一直按下一步即可。我安裝的版本是 ImageMagick-7.0.9-8-Q16-x64-dll.exe,可以按此下載。
Linux 版安裝方法
以下的安裝方法主要是參考 TechMint 網站上的文章[6],測試環境為 Linux Mint 19.1 Cinnamon,採用編譯安裝,先安裝編譯需要用的套件
$ sudo apt update
$ sudo apt-get install build-essential
下載原始碼並解壓縮
$ wget https://www.imagemagick.org/download/ImageMagick.tar.gz
$ tar xvzf ImageMagick.tar.gz
進到解壓縮後的資料夾中,檢查環境設定、編譯並安裝
$ cd ImageMagick-7.0.9-8/
$ ./configure
$ make
$ sudo make install
設定指令的動態連結
$ sudo ldconfig /usr/local/lib
確認安裝的版本
$ magick -version
縮小檔案
假設檔名為 TwoSourcesInterference3D.gif,可以使用以下的指令縮小檔案,縮小後的檔案命名為 TwoSourcesInterference3D_r.gif。
magick convert TwoSourcesInterference3D.gif -fuzz 5%% -layers Optimize TwoSourcesInterference3D_r.gif
參考資料
- 維基百科兩個點波源水波干涉動畫 https://upload.wikimedia.org/wikipedia/commons/2/2c/Two_sources_interference.gif
- Generate animation of 3D surface plot using plot_surface and animation.FuncAnimation in Python and matplotlib.pyplot https://pythonmatplotlibtips.blogspot.com/2018/11/animation-3d-surface-plot-funcanimation-matplotlib.html
- StackOverflow Set Matplotlib colorbar size to match graph https://stackoverflow.com/questions/18195758/set-matplotlib-colorbar-size-to-match-graph
- StackOverflow Configure matplotlib colorbar to match 3D surface values https://stackoverflow.com/questions/56112328/configure-matplotlib-colorbar-to-match-3d-surface-values
- imagemagick https://imagemagick.org/index.php
- How to Install ImageMagick 7 on Debian and Ubuntu https://www.tecmint.com/install-imagemagick-on-debian-ubuntu/
HackMD 版本連結:https://hackmd.io/@yizhewang/HJYw0EJ0r
沒有留言:
張貼留言